Featured Snippet / Short Answer
You can safely repot a plant into a self watering planter, but the process is different from regular repotting.
The key is proper root preparation, correct soil choice, and careful reservoir use.
The first 2–3 weeks are critical — this is when plants adapt, and most problems (wilting, root stress, overwatering) occur.
Introduction
Self watering planters promise easier plant care — but repotting into one often feels scary.
Many plant owners think:
- “What if the roots don’t reach the water?”
- “What if I overwater and cause root rot?”
- “Why did my plant start wilting after repotting?”
These fears are valid. Repotting into a self watering planter is not the same as regular repotting.
The difference lies in how roots access water and oxygen.
When done incorrectly, plants may wilt, yellow, or stop growing — even though the planter is “self watering.”
If you’re already seeing this problem, it’s closely related to the issues explained in Why Is My Plant Still Wilting in a Self Watering Planter?
This guide will walk you through how to repot a plant into a self watering planter safely, step by step — without panic, myths, or guesswork.
When You Should (and Should’t) Repot Into a Self Watering Planter
✅ When repotting is a good idea
Repotting into a self watering planter works best when:
- The plant is actively growing (spring to early fall)
- Roots are healthy and light-colored
- The plant has outgrown its old pot
- You want more consistent moisture for thirstier houseplants
Healthy roots adapt faster and are better at adjusting to bottom-up watering.
❌ When it’s better to wait
Avoid repotting if:
- It’s mid-winter and growth is slow
- The plant is already stressed, diseased, or recently transplanted
- Roots are weak, mushy, or severely damaged
Cold seasons reduce water uptake and root activity. If you’re unsure about seasonal performance, see Do Self Watering Planters Work in Winter?
What You Need Before Repotting
Preparation prevents 90% of mistakes during self watering planter repotting.
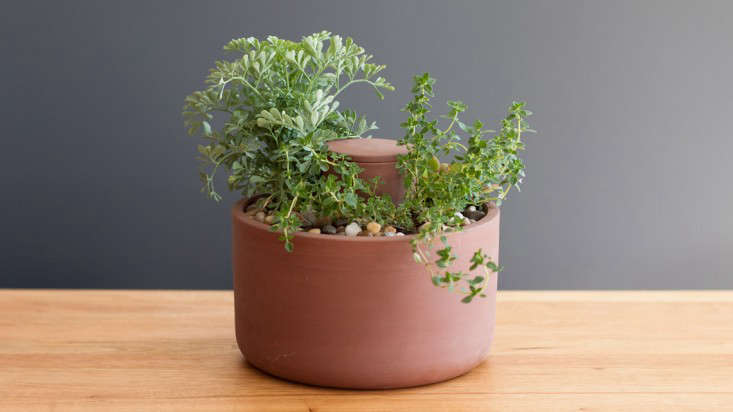
1. The right self watering planter
Choose a planter with:
- A reliable water reservoir
- A wick, column, or insert that connects soil to water
- Adequate drainage and airflow
Too large a reservoir increases the risk of overwatering during adaptation.
2. Proper soil mix
Soil is critical. Heavy garden soil will suffocate roots.
Use a mix that is:
- Light and airy
- Well-draining
- Capable of wicking moisture upward
Many problems like yellow leaves are linked to poor soil oxygen — a common cause explained in Why Are Leaves Turning Yellow in a Self Watering Planter?
3. Clean reservoir and components
Before use:
- Rinse the reservoir
- Remove dust or old mineral buildup
- Make sure wicks or columns are unobstructed
4. Water (with nuance)
Use room-temperature water.
If you’re using tap water, mineral content may matter depending on your location — see Can You Use Tap Water in a Self Watering Planter?
Step-by-Step: How to Repot a Plant Into a Self Watering Planter
This is the core process for repotting into a self watering planter.
Step 1: Prepare the plant
- Water the plant lightly 24 hours before repotting
- This reduces root shock and makes removal easier
- Avoid repotting dry or severely dehydrated plants
Step 2: Remove and inspect the roots
Gently remove the plant from its old pot.
Check roots carefully:
- Healthy roots = firm, light-colored
- Problem roots = dark, mushy, foul-smelling
Trim only clearly dead roots.
Do not aggressively loosen healthy roots — stability helps adaptation.
Step 3: Prepare the soil
Lightly moisten the soil mix before planting.
It should feel damp, not wet.
Dry soil struggles to wick water upward, while soaked soil removes oxygen.
Step 4: Set up the self watering planter
- Assemble the planter according to its design
- Ensure the wick or column is correctly positioned
- Add a small base layer of soil if required
This step is crucial for self watering planter setup for plants — poor contact means roots won’t access moisture later.
Step 5: Position the plant correctly
Place the plant so that:
- Roots sit naturally, not bent upward
- The root zone has direct contact with the wick or column
- The crown stays above soil level
This ensures successful moving plant to self watering planter without suffocation.
Step 6: Fill and stabilize
Add soil around the roots gently.
- Do not compact or press hard
- Light tapping is enough to remove air gaps
- Roots need oxygen as much as water
Step 7: First watering (top only)
Water from the top until excess drains out.
This helps:
- Settle soil around roots
- Activate wicking
- Reduce transplant shock in self watering planter setups
Step 8: Do NOT fill the reservoir yet
This is where many beginners go wrong.
Leave the reservoir empty for 7–10 days.
Roots must first adapt to their new environment.
Common Mistakes After Repotting
Even with correct planting, mistakes after repotting can cause problems.
🚫 Filling the reservoir immediately
This often leads to:
- Root suffocation
- Wilting despite wet soil
- Slow recovery
This is one of the main reasons discussed in Why Is My Plant Still Wilting in a Self Watering Planter?
🚫 Compacting the soil
Pressed soil blocks airflow and prevents wicking.
🚫 Ignoring the adaptation phase
Self watering systems work best after roots adjust, not instantly.
Special Cases: Seedlings 🌱
Seedlings require a different approach.
- Their roots are too shallow
- Constant moisture can cause rot
- Wicking may be uneven
For this reason, beginners often struggle with repotting houseplants self watering pot systems when plants are very young.
First 2–3 Weeks After Repotting (Critical Period)
This phase determines success.
What to do
- Check soil moisture every few days
- Water lightly from the top if soil dries
- Keep the reservoir empty for the first week
When to add water to the reservoir
After 7–14 days, once:
- The plant stops wilting
- New growth appears
- Leaves regain firmness
Then, add a small amount of water to the reservoir — not full.
Signs of healthy adaptation
- Leaves perk up
- No new yellowing
- Soil dries slowly, not soggy
Signs of trouble
- Persistent wilting
- Yellow leaves
- Sour soil smell
FAQ
Should I water from the top after repotting?
Yes. Always top-water initially to help roots settle and activate the wicking system.
When should I fill the reservoir?
Wait at least 7–10 days, longer in winter or for sensitive plants.
Is wilting normal after repotting?
Mild wilting is normal for a few days.
Can I repot in winter?
You can, but success rates are lower. Learn more in Do Self Watering Planters Work in Winter?
Final Thoughts
Learning how to repot a plant into a self watering planter is less about speed and more about patience.
Remember:
- Roots need oxygen before constant water
- Soil structure matters more than the reservoir
- The first weeks decide everything
Once adapted, self watering planters become one of the most stable and forgiving systems for houseplants — especially for beginners.
Take it slow. Your plant will tell you when it’s ready 🌿